
Wayfair Bed Furniture Assembly
Assembly Projects
Home Improvement – Wayfair Bed Furniture Assembly
Have you yourself ever hit your knees on your bedframe? And has it happened over and over again?
Fortunately, we were here to help rescue a client with an issue that you might be familiar and frustrated with: Painful Bedframes! Here’s what you need to know! After many sleepless nights of throbbing pain from hitting her bedframe on her way into bed, she had enough!
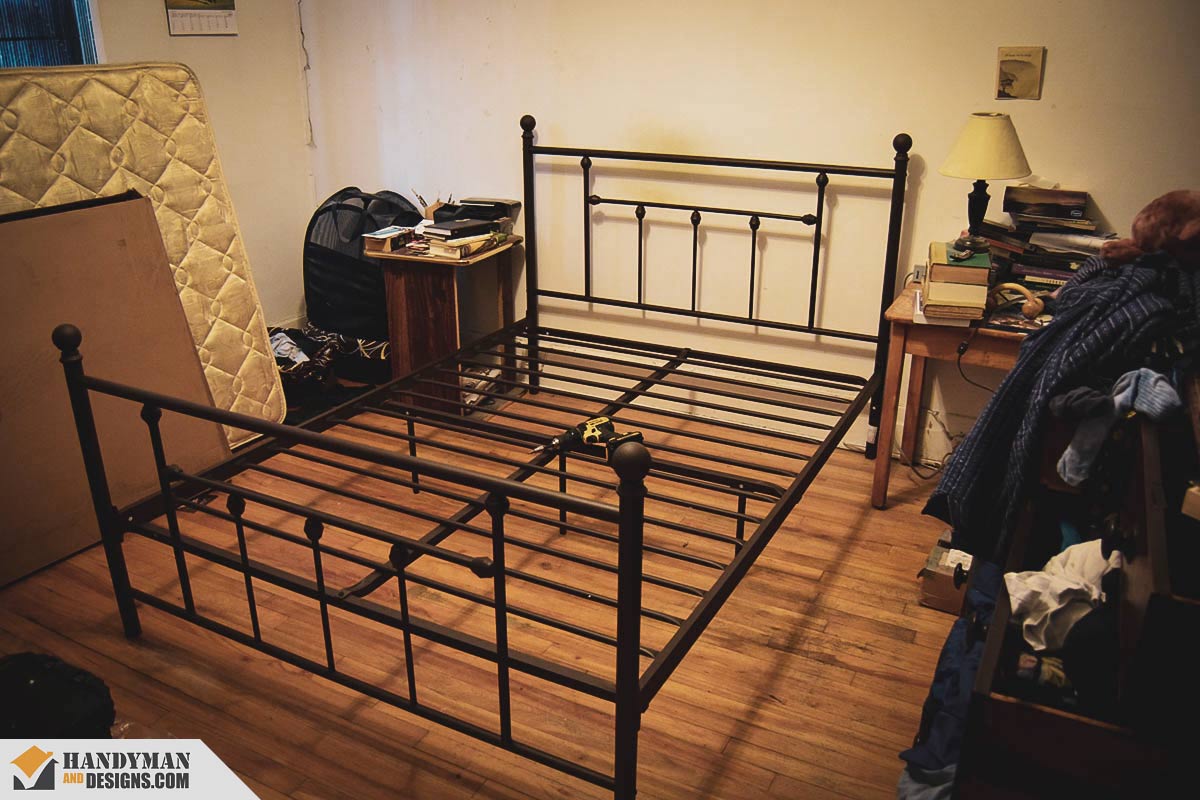
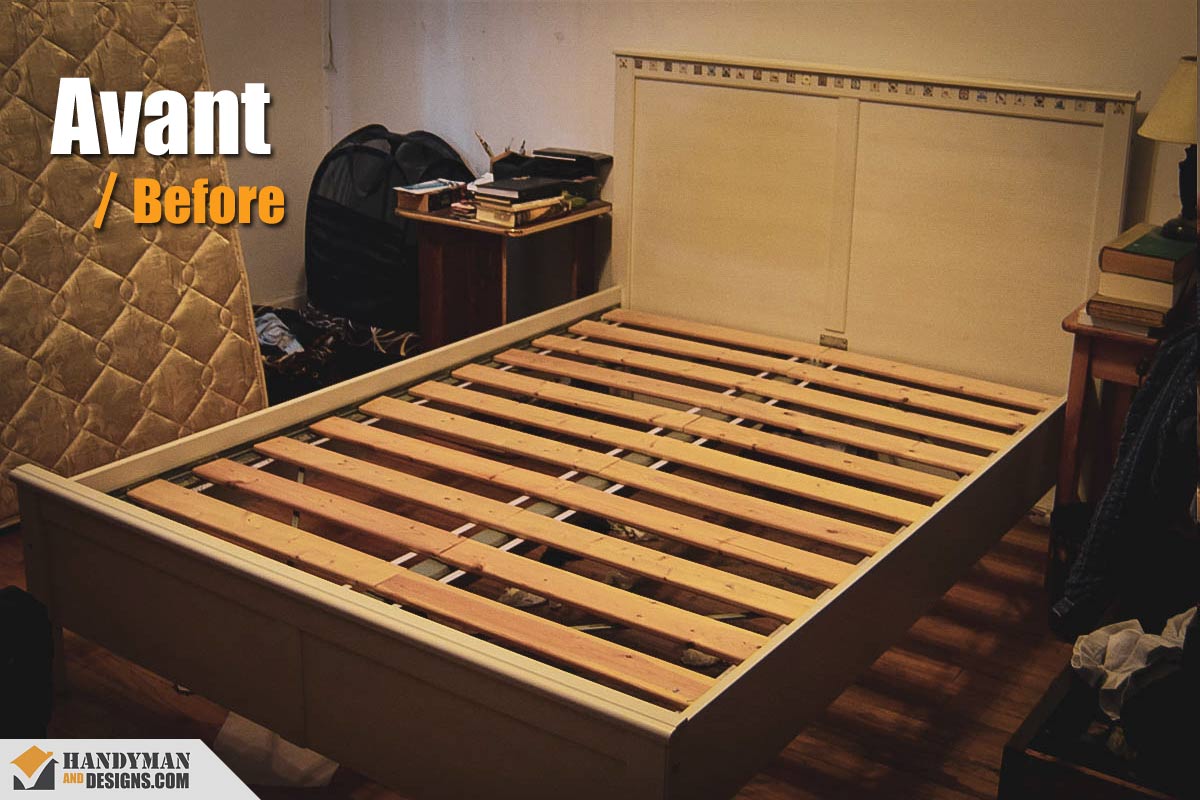
She placed a call for help, we answered, and we came by the next day to help her say goodbye to her former terror, a wooden sharp-cornered bedframe. It was “OUT” with the old and “IN” with the new! And in this case, the new was a softly rounded metal framed bed that she was delighted to find on Wayfair.ca.

Our Client’s Requirements
In this furniture assembly project, after many years of leg impacts, our client was tired of bumping into the corners of her hard-edged wooden bedframe. She required a new bed ASAP since the aches from her old one had become too painful to bear. To remedy her pain, we were called in one late afternoon to dismantle her old bed and assemble a new one purchased from Wayfair.ca.
The requirements:
- Dismantle an old wooden bed and place all the pieces on the back porch.
- Assemble a new metal bedframe from Wayfair.
- Keep everything clean, and when complete, remove all packaging materials.
An Easy 8-Step Build Guide for a Successful Bed Assembly
The following notes will help you understand how the assembly process works and how to correctly assemble your furniture with ease.
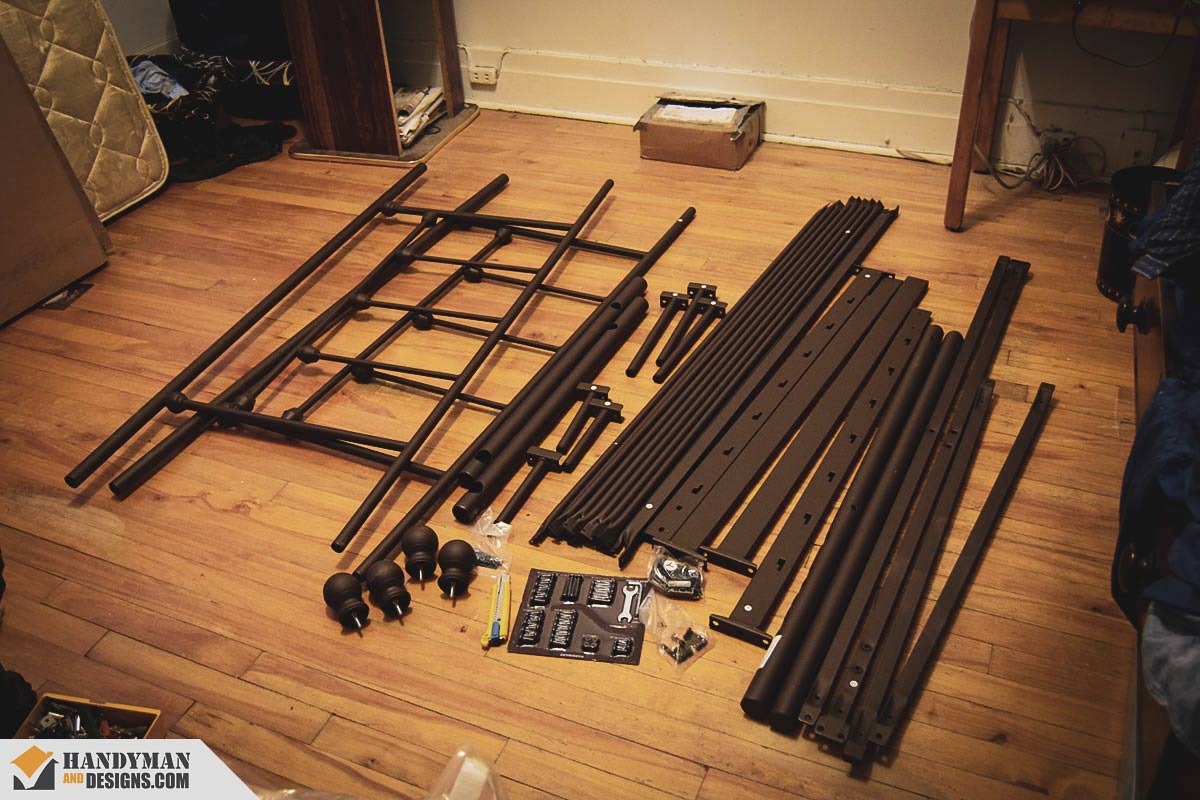
- Step #1:
- Unpack all the pieces from the box and sort them out on the floor. This will allow you to see the broader context of your upcoming challenge.
- Step #2:
- Carefully read the instructions booklet from cover to cover, and note any special mentions or warnings.
- Step #3:
- Start assembling the parts in order, as instructed by the instructions booklet. Don’t skip ahead.
- Step #4:
- For a bed or any furniture made of metal, attention must be given to aligning screws so that they are screwed in straight. If they are misaligned in any fashion, threads can potentially become damaged, resulting in an unusable thread hole.
- Step #5:
- As you assemble your unit, provide lift support when and where needed to prevent any damage due to early stress or weight. If you don’t have a helping hand, carefully lay the piece on the ground so there is never too much stress on any parts you suspect could get damaged.
- Step #6:
- Keep assembling each part until, according to the instructions, the step is fully complete.
- Step #7:
- Before the unit becomes too heavy, carefully move the furniture item into its designated place. Use towels under the legs to prevent scratching if you have bare wood floors.
- Step #8:
- Once the item is in place, add the finishing touches such as doors, drawers, etc., and voila! You are all done. Congratulations!
For additional tips and tricks on furniture assembly, check out our other completed projects: Walmart Storage Bed – Furniture Assembly and Ikea & Wayfair Furniture Assembly
Two Tips for Your Furniture Assembly Projects
Tip #1: Beware of stripping screw threads
When working with metal, care must be taken to correctly fasten screws. If a screw refuses to go in, do not force the bugger in because this means it is not accurately aligned. If forced, you can damage the threads and end up with a screw that keeps spinning forever, and ever, and ever. So be careful, take your time, and stay vigilant.
Tip #2: What You’re Not Supposed to Do
Don’t jump to a later page in the instructions booklet when assembling your unit. If you skip any steps, it can always lead to problems. For example, you might use pieces reserved for the starting phase or attach something together prematurely, so it ends up breaking from stress or weight. Never skip ahead.
Tool Recommendations
Note: When you make a purchase through our links, we may earn commissions from Amazon, ClickBank or other retailers at no extra cost to you. Our recommendations are based on our personal and professional experience using products we suggest, and we recommend them because we believe they are genuinely helpful, not because of the small commissions we may receive. Please only purchase a product if you believe they will help you achieve your goals.
Beyond by BLACK+DECKER Home Tool Kit with 20V MAX Drill/Driver – There are many slightly cheaper alternatives for tool kits with a drill, but we chose to recommend this starter kit because it’s from Black and Decker. It comes with stronger drill bits, screwdriver bits, and tools. You can’t use this for building a deck, fixing a roof, repairing your car, or anything else that is considered hardcore, but it’s great for furniture assembly, fixing bikes, and simple repairs. The quality is a step up from the DEKOPRO unit we recommend below, because this kit also comes with a drill/driver. It’s a good starting package for DIY enthusiasts who would like to learn how to fix things around the house. Amazon.com | Amazon.ca
DEKOPRO 150 Piece Tool Set – The tool set is outfitted with an assortment of tools to help you tackle household jobs. It contains essentials needed for most small repairs, furniture assembly, and basic DIY projects around the house, plus, it comes in a rugged case for easy transportation. It’s not too expensive, however, it‘s best used for simple repairs. We don‘t recommend using this set to fix your car, or for any long term hard labor, like decking or fixing a roof. Otherwise, it‘s a great set to have for emergencies, and it makes a thoughtful gift for men. Amazon.com | Amazon.ca
38-Piece Magnetic Ratcheting Screwdriver Set – For IKEA and similar furniture, it’s always a good idea to tighten everything down by hand. This little set has all the bits needed to complete a furniture assembly project. As a bonus, it has a ratcheting system, so you don’t have to reposition your grip after each twist. It also has a magnetic tip, and you can store bits inside the handle. Neat! Amazon.com | Amazon.ca
Tool Purchases to Avoid
For this project, there are tools that are needed, and then there are tools that should be avoided. The following are a few tools that you should absolutely never purchase!
Corded or Battery Powered Drill With No Slip Clutch For Torque Control – Never use a drill with no torque control for furniture assembly. Period. It will cause your screws to strip the threads of the pre-drilled holes, or worse, it will drill the screw right through the board and into your floor. Best to avoid ever buying a drill with no torque control.
Are You Looking to Improve Your Home and Require Some Furniture Assembly? We Heard You!
Wayfair bed assembling is a straightforward task, but sometimes, things can go wrong. Little details might not add up, and you might need help from an experienced furniture assembler. That’s where we come in. We can help you assemble a bed, a cabinet, a table, and so much more!
View more of our completed Furniture Assembly projects. And if you haven’t already, check out our services offered: Handyman Services » Furniture Assembly and Handyman Rates.
Contact Us today. We look forward to working with you. Until then, all the very best wishes from Handyman And Designs.