Wood Counter Display Units
Custom Projects
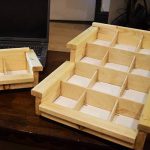
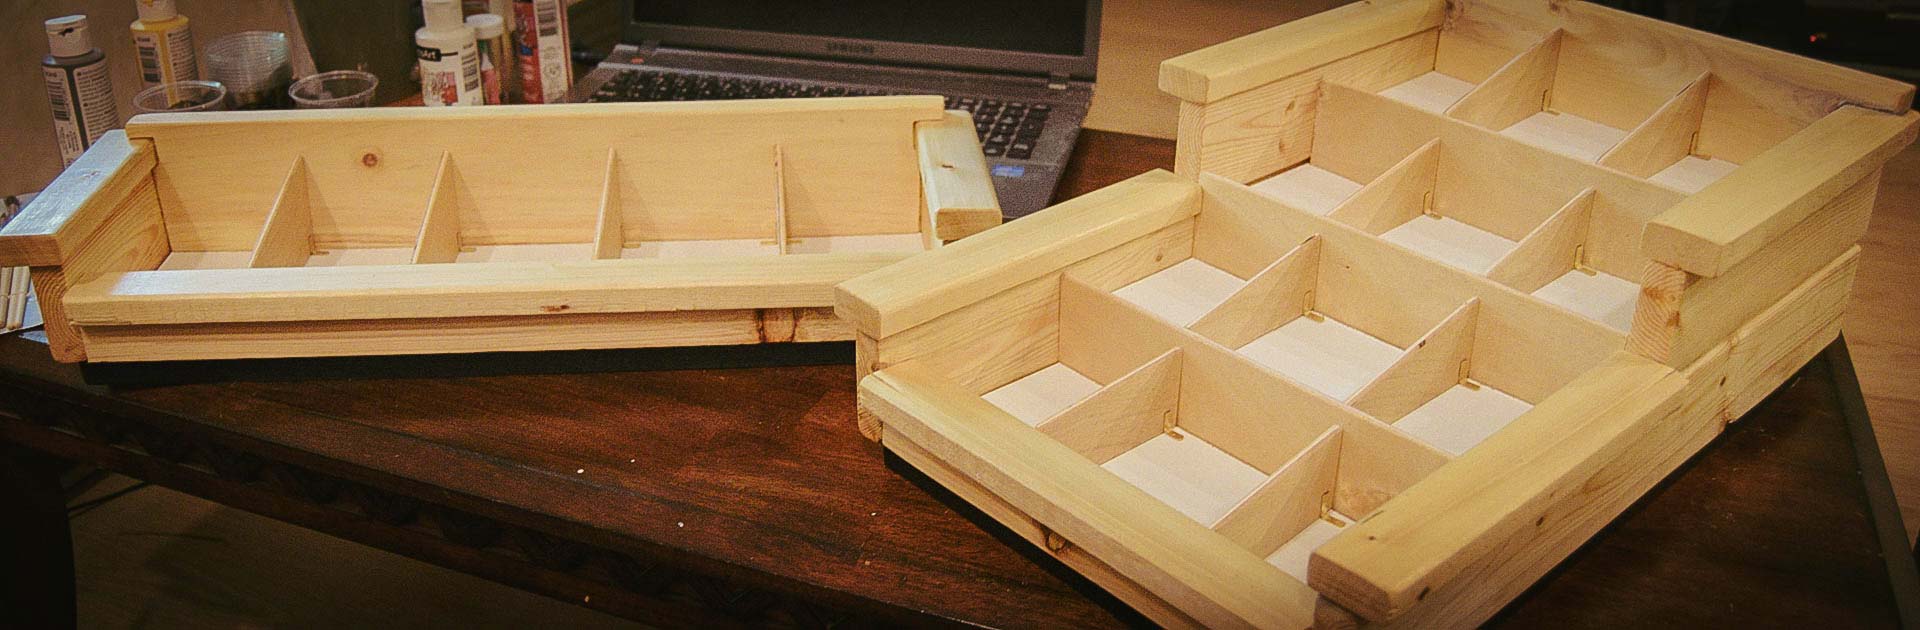
Wood Counter Display – A Step by Step Guide
It’s not hard to see the allure of a well-made wood counter display. It can add a touch of sophistication to any space, and more importantly, keep a showcase of merchandise organized. As Artisans of Handyman and Designs, we love to craft accessories that are both sturdy and stylish. In the following article, we will take you through the process, Step by Step, of how we designed and crafted these two display units. Who knows, perhaps one day, you will want to make one of these little beauties yourself.
Hold on to your hats – Let’s Begin!
- Step ##: The Requirements?
- Step #1: Sketch and Plan Your Design
- Step #2: Collect Your Materials
- Recommendation Highlight – Woodwork101
- Step #3: Cut the Boards and Pieces to Size
- Step #4: Filler and Sanding
- Step #5: Apply a Sealant or Finish of Your Choice
- Final Note: A Quick Sum Up
- Tool Recommendations
- What’s the Wait? Team Up with Us for Your Next Project step-5-aplly-sealant-or-finish-of-your-choice

Step ##: The Requirements?
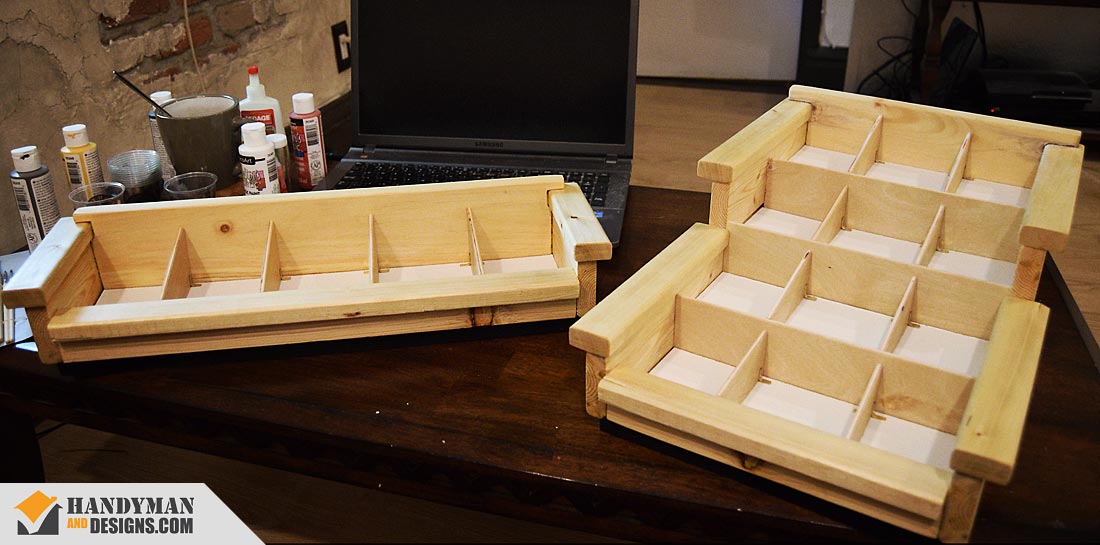
Since these two units were built for a commercial restaurant, we had to keep the following in mind when we came up with the design:
- The width and length of each compartment had to fit a regular sized chocolate bar.
- The compartments should be able to shift around to accommodate different sized food items.
- The display unit should be layered so that shoppers can easily see each item on display.
- The units must match the décor of the restaurant’s counter, so it should be made with wood, contain white interior compartments, and have a black base to accentuate the upper wooden body.
With the above specs in mind, we got to work!
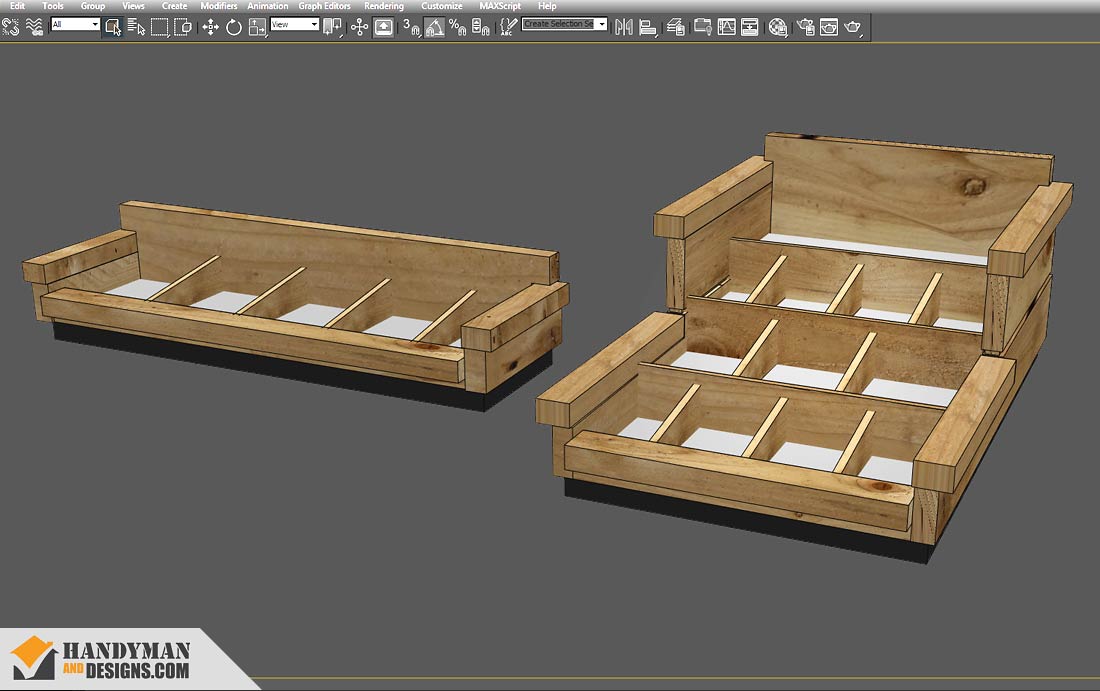
Step #1: Sketch and Plan Your Design
As highlighted in our Custom Wood Counter build, here too, sketching is the first and arguably the most important step in crafting an object in wood. It lets you map out your design, ensuring that every element is accounted for and in the correct position. Sketching also allows you to experiment with different designs until you find one that is both practical and unique. Either a quick pencil sketch on a napkin, or a rough sketch in 3D with a program like 3ds Max or Blender, sketching is essential for any build.
Step #2: Collect Your Materials
After you determine where your wood counter display will sit, and you are done creating a sketch/design for it, it’s time to start gathering materials for your build. Aside from purchasing assorted wood pieces, you will also need basic supplies like screws, nails, varnish, paint and adhesive. If you are new to hardware stores like Réno-Dépôt or Home Depot, note, it might take a lot of time to find what you need. Nevertheless, once all materials are acquired, it’s finally time to have some fun! It’s crafting time!

Woodwork101 – Custom-build your own furniture
For those interested, we personally purchased this package during our adventures to become better craftsmen – Woodwork101. Although there are plenty of resources that can be found online, it’s always good to have a condensed package to read and listen to during your spare time.
Woodwork101 has comprehensive materials full of tips, tricks, and tales on how best to build with wood. With over 1000 hours of video tutorials and an assortment of schematics for numerous forms of projects, it’s a big help to get your creative adventures started. It’s ideal for DIY enthusiasts who are looking to learn a new trade. With Woodwork101, see how you can build personal, beautiful and sturdy wooden art. If new to the trade, Woodwork101 helps give you an understanding of wood, so you can create bigger and better things now and into the future to come.
For more information, and to purchase your own kit today, visit: Woodwork101

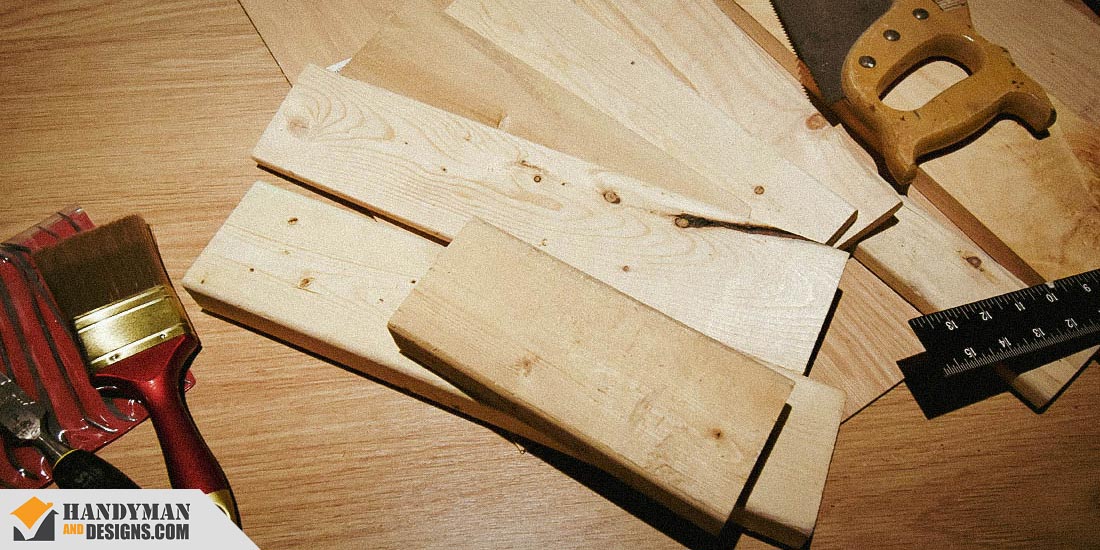
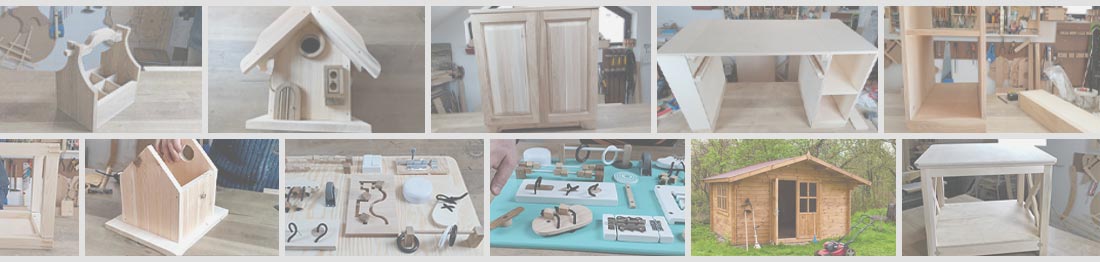
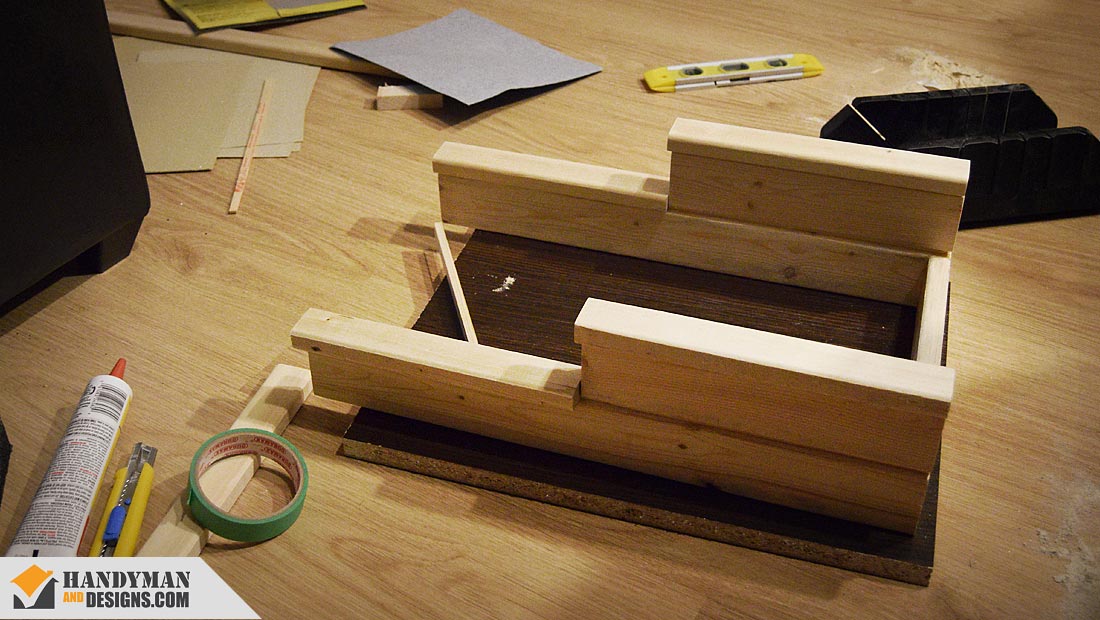
Step #3: Cut the Boards and Pieces to Size
After you’ve gathered your materials and made your measurements, it’s time to start cutting your materials to size. Make sure that you use a sharp saw for this step, as it helps make clean cuts and prevents splintered edges. Once you’ve cut your materials to size, assemble them according to the plan of action you’ve set.
If applying adhesive, use clamps to help hold everything in place. Take your time and be precise, because you don’t want a flimsy display unit. Work on different pieces so that one part can be left to dry while you work on another. If your particular project is heavy, you might need to use screws or nails, but it’s not mandatory for small items like shelves and compartments.
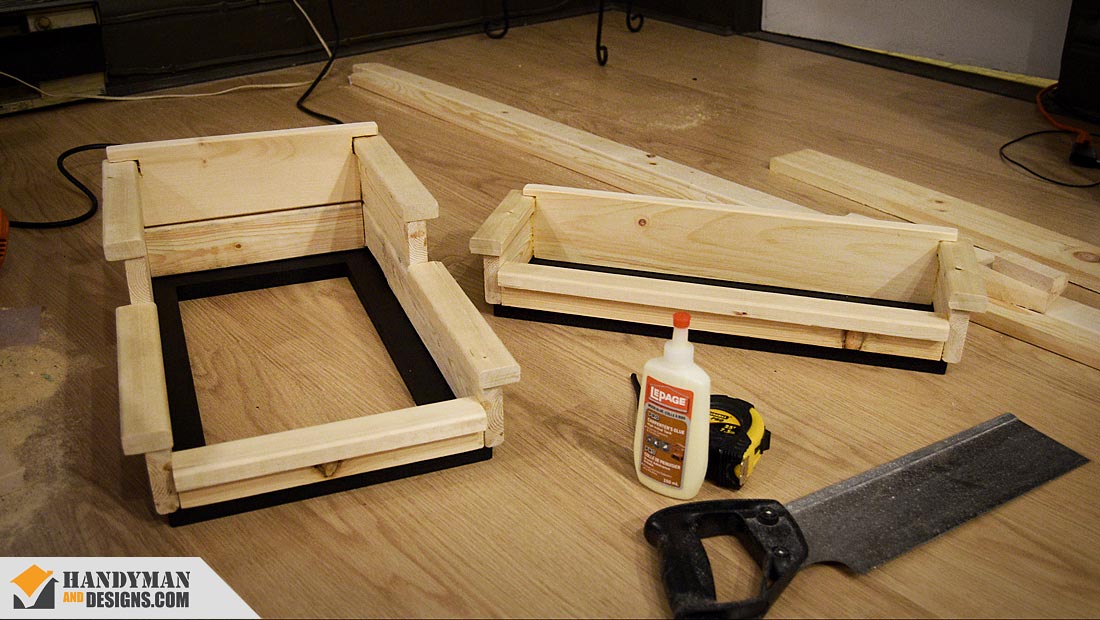
Step #4: Filler and Sanding
Once everything is assembled, it’s time to look for any cracks or crevasses. Fill all imperfections with a touch of wood putty. When done filling, sand down the entire surface to create a smooth and clean finish. Take your time here, because nobody wants a splinter after they touch your piece of art. So sand everything down until everything is nice and smooth.
Step #5: Apply a Sealant or Finish of Your Choice
Finally, if you prefer a different tint for your finish, now is the time to apply a stain. With most stains, you can use a cloth to apply it to the wood. You can then use another cloth to wipe excess stain away for a stroke-free finish. After you are all done applying stain, and after everything is thoroughly dry, it’s time to seal your work. Depending on the stain used, you can now apply a sealer or varnish. Generally, it’s best to use a stain and sealer from the same brand in order to guarantee a perfect harmony between products. Some sealers require a touch of sanding between coats. If you read the the instructions on the label and diligently follow their advice, a fantastic finish is guaranteed. When done, you now have a waterproofed and perhaps even a scratch-resistant show stopper. Awesome work!Final Note: A Quick Sum Up
There you have it! A quick step-by-step guide on how to create a wood counter display. With careful planning and a little patience, you too can create your very own professional-looking display. Just remember, take your time and always double-check your work. As the famous saying goes – “Measure twice, cut once.” However, if things go astray and you’d like to put down the measuring tape and hang up your woodwork apron, please feel free to contact us for help, or have a look at Woodwork101 – a great resource and guide for some or all of your future work.
Thanks for reading, and good luck!
Tool Recommendations
Note: When you make a purchase through our links, we may earn commissions from Amazon, ClickBank or other retailers at no extra cost to you. Our recommendations are based on our personal and professional experience using products we suggest, and we recommend them because we believe they are genuinely helpful, not because of the small commissions we may receive. Please only purchase a product if you believe they will help you achieve your goals.
Makita LS1219L 12″ Slide Compound Mitre Saw – Perfect for workshops, homes and garages! Although we do not have this bad boy at the time of this writing, we aim to get one for our upcoming Sci-fi Workshop Studio. There are other brands that also offer compact backspace features, like the RIDGID 12″ R4251, however we believe that miter saw with arms, instead of rails, shake when their blades are fully extended. For absolute precision, it’s best to stick with a railed system. Amazon.com | Amazon.ca
WEN VC4710 10-Amp 5-Gallon Portable HEPA Wet/Dry Shop Vacuum and Blower – Compact and powerful, this tiny Shop Vac is perfect for any job site. Not only is it powerful, but you can also build a dust cyclone system above its compact form for easier and cheaper dust collection and disposal. Amazon.com | Amazon.ca
Carpenter Glue – It’s generally best to use a wood glue instead of construction glue for cabinet projects. It has a very strong bond, and it’s easy to sand to a clean finish before applying paint or varnish. To be safe, just buy a big bottle to begin with, because when you need it, you ReAlLy need a lot of it! Amazon.com | Amazon.ca
Tool Purchases to Avoid
For this project, there are tools that are needed, and then there are tools that should be avoided. The following are a few tools that you should absolutely never purchase!
Mastercraft Sliding Compound Mitre Saw with Laser, 10-in – There is a reason why you find these units always on sale at half price or more. It’s because everyone returns them for a refund. We bought one ourselves because it looked pretty and had a nifty laser guide, but we quickly realized we couldn’t use it. The sliding rail system stutters/jerks when you move the blade back or forth, so precise cuts are impossible. Stay away.
Compound Mitre Saws – Eons ago, we had a Bosch compound miter saw in our shop. It served us well until we upgraded to a miter saw with a rail. Wow. It’s like using a hand saw instead of a chainsaw to cut a tree. It’s a world of difference! Just get a sliding miter saw as your personal first and skip a newb purchase of a stationary compound miter saw.
Mastercraft Drill Press with LED – Again, we bought this because it looked pretty. After assembling and using it for the first time, we quickly dissembled it, placed it back in the box, and ran back to the store for a full refund. The drill bit wobbles when drilling, making precision holes of any size absolutely impossible. Stay away.
What’s the Wait? Team Up with Us for Your Next Project
From initial consultation to a final installation, as Artisans of Handyman and Designs, we stand for quality during all steps of our work. We believe that a well-designed space should be functional and beautiful, and we take pride in creating custom solutions that reflect you, our client’s, unique needs and style. Whether redesigning an old room or revamping the decor of an existing space, our goal is to always create a design that our clients love. To us, that’s what good design is all about. So, if you are looking for a team of experienced professionals who can help you turn your vision into reality, look no further than Handyman and Designs. We’re here to help make your dream a reality. Find more info about our Handyman Services offered and Handyman Rates, or simply Contact Us today to discuss what we can do for you and your home or business.